Dies ist eine alte Version des Dokuments!
Zertifikate akzeptieren
miradlo bietet den Webmailzugriff nur über eine sichere, SSL-verschlüsselte Verbindung an. Das gewährleistet einen höheren Sicherheitsfaktor bei Datenübertragung. Daher ist es nötig, dass sich Ihr Browser (Firefox, Internet Explorer, Safari usw.) bei der Benutzung von Webmail Zertifikate herunterlädt. Auch Programme wie Outlook, Thunderbird, AppleMail, KMail usw. benötigen dieses Zertifikat. Beim ersten Zugriff auf die Mails, mit einem der oben genannten Browsern oder Mail-Programmen, erscheint ein Dialogfenster welches Sie darauf hinweist dass sie solch ein Zertifikat benötigen. Akzeptieren bzw. downloaden Sie dieses Zertifikat. Es dient lediglich zur Sicherheit.
Cacert Zertifizierungsstelle
Manche Zertifizierungsstellen sind bereits in Browsern und Mailprogrammen vorinstalliert. Die Stelle cacert.org meist jedoch nicht. Das Zertifikat des miradlo-Servers ist von cacert geprüft. Um es zu überprüfen, müssen zunächst die Zertifikate von cacert.org importiert werden.
Zertifikat in den Browser importieren
Für Firefox genügt ein Klick auf den Link für das Root- und das Intermediatezertifikat damit installiert Firefox es selbständig.
Zertifikat in ein Mailprogramm importieren
Um die Zertifikate in ein Mailprogramm wie Thunderbird, Outlook usw. zu importieren, wählt man mit der rechten Maustaste „Ziel speichern unter“ beim Root- und Intermediatezertifikat und anschließend importiert man das Zertifikat wie untenstehend beschrieben.
Zertifikate importieren
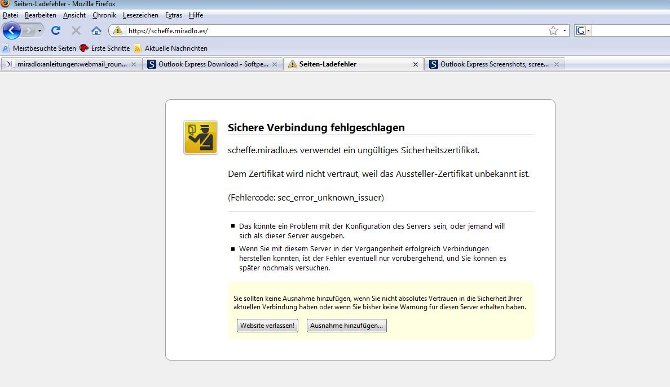
Im folgenden einige Bilder wie solche Meldungen aussehen könnten:
Zertifikat mit Firefox bestätigen
Lassen Sie sich nicht irritieren, und wählen Sie Ausnahme hinzufügen
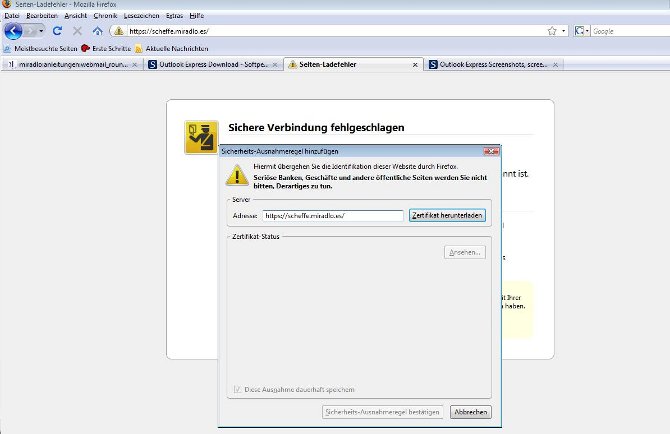
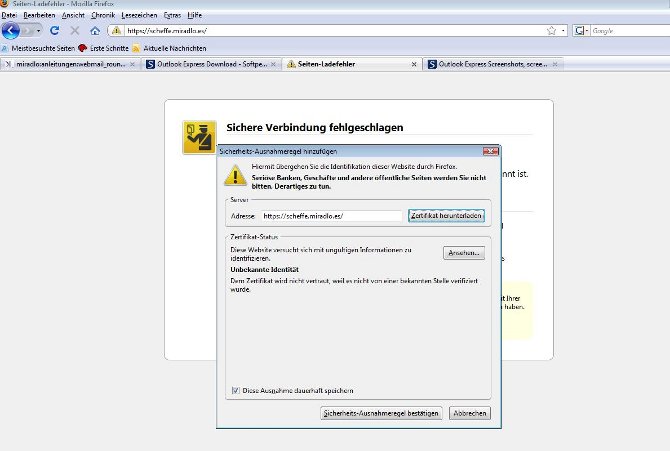
Wählen Sie Zertifikat herunterladen und daraufhin sicherheits-Ausnahmeregel bestätigen
Setzen Sie ein „Häkchen“ auf Diese Ausnahme dauerhaft speichern
Zertifikat mit Safari bestätigen
Sobald das Dialogfenster erscheint, haben Sie die Möglichkeit sich das Zertifikat ersteinmal anzusehen.
Setzen Sie ein Häkchen auf Diesem Zertifikat immer vertrauen und wählen Sie anschliessend Fortfahren
Die Seite ist nun ersichtlich.
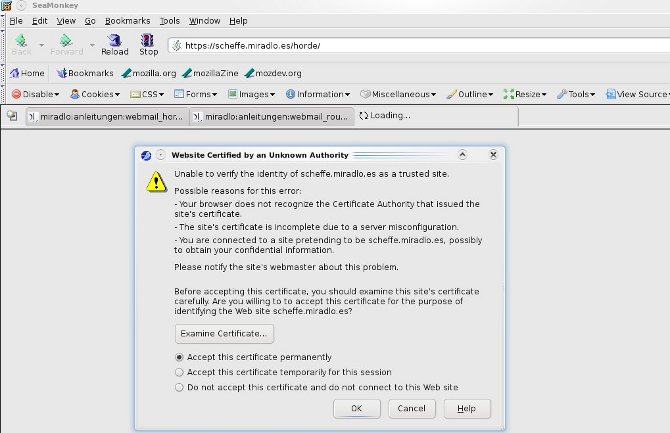
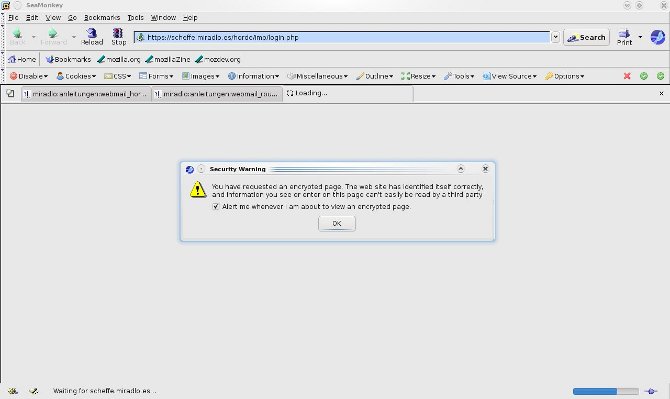
Zertifikat mit Seamonkey bestätigen
Wählen Sie Accept this certificate permanently und anschliessend O K
Klicken Sie nocheinmal auf den Button O K
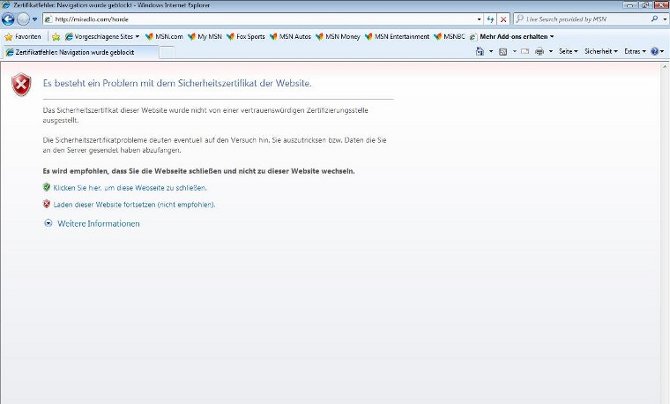
Zertifikat mit Internet Explorer bestätigen
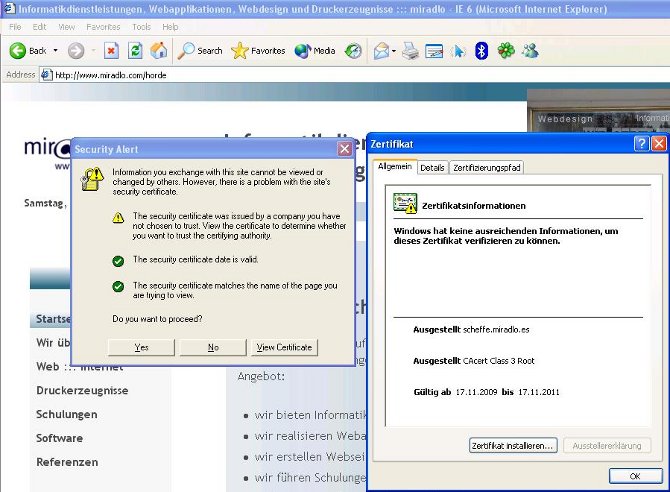
IE6
Wählen Sie View Certificate und anschliessend Zertifikiat installieren
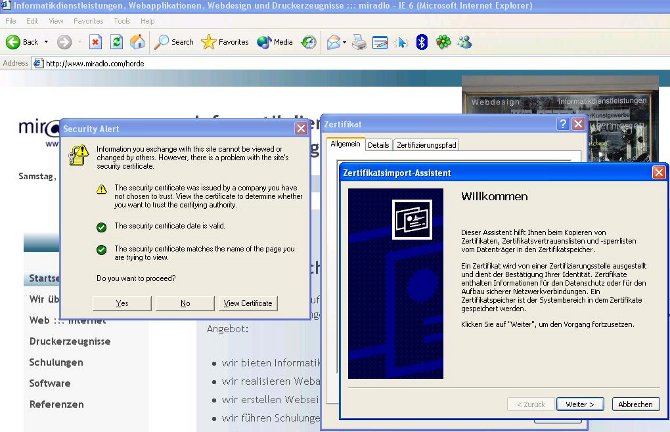
Klicken Sie auf den Button Weiter
Setzen sie ein „Häkchen“ auf Zertifikatspeicher automatisch auswählen (auf dem Zertifikat basierend) und anschleissend auf Weiter
Wählen Sie Fertig stellen
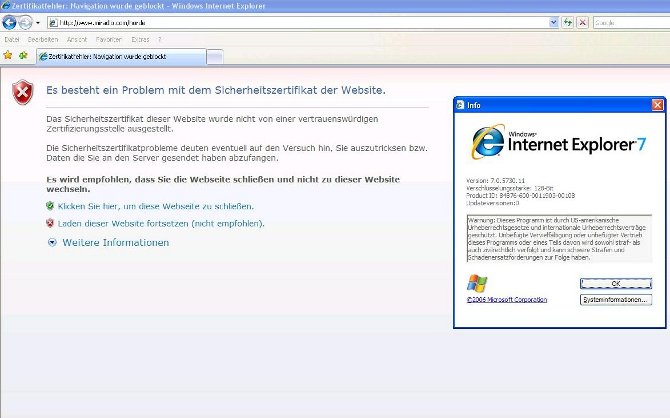
IE7 und IE8
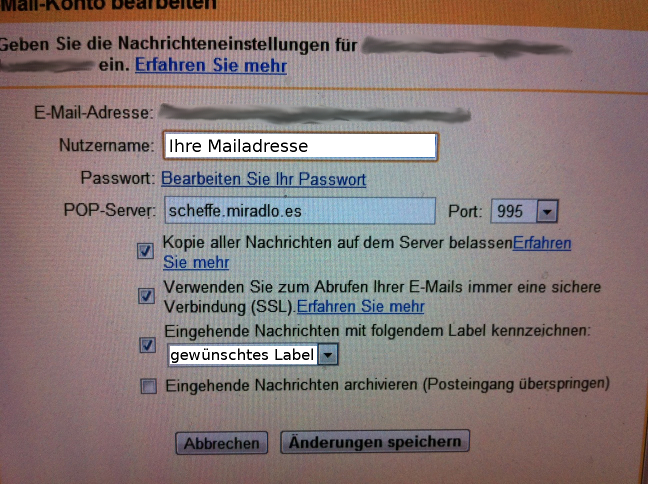
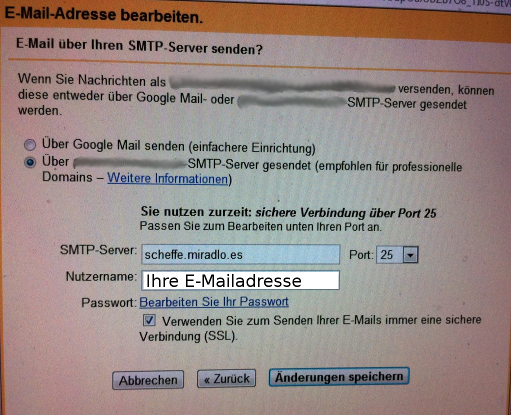
GoogleMail
Bei GoogleMail können Mails von verschiedenen Accounts aggregiert werden. Die folgenden Bildschirmfotos illustrieren die Einrichtung.
Hinweis
Windows 7 Zertifikat installieren
http://wiki.cacert.org/BrowserClients#Microsoft_Internet_Explorer Import into Microsoft Windows for multiple users If you have more than one account on your computer you don't want to install the CAcert Root Certificate for every single user. Therefore you can manually import the CAcert Root Certificates into the Local Machine Store. This procedure works only for Microsoft programs (e.g. Internet Explorer and Outlook), so you will also need to import the certificate into non-Microsoft browsers and e-mail programs. 1.Go to the CAcert Root Certificate website: http://www.cacert.org/index.php?id=3 2.Download the 'Root Certificate' and the 'Intermediate Certificate' (choose either DER or PEM Format - it doesn't matter) 3.Log in as an Administrator 4.Click the windows Start button and choose Run 5.Type MMC, then hit Enter 6.From the new window open the File menu and choose Add/Remove Snap-in… 7.click the Add Button 8.choose the certificates item from the listbox and click the Add Button 9.choose the Computer Account radio button and click the Next Button 10.choose the Local Computer radio button and click the Finish Button 11.click the Close Button 12.click the Ok Button 13.expand the tree to view Trusted Root Certification Authorities node 14.right click on the Trusted Root Certification Authorities 15.find the All Tasks menu item then choose Import off that menu and click Next 16.type in, or browse to the class 1 Root certificate you previously downloaded and click Next 17.verify that the radio box labeled Place all certificates in the following store is checked and that text box says Trusted Root Certification Authorities 18.click Next and then Finish. You should get a message saying the import was successful. 19.right click on the Intermediate Certification Authorities 20.find the All Tasks menu item then choose Import off that menu and click Next 21.type in, or browse to the class 3 Intermediate certificate you previously downloaded and click Next 22.verify that the radio box labeled Place all certificates in the following store is checked and that text box says Intermediate Certification Authorities 23.click Next and then Finish. You should get a message saying the import was successful. You may close the MMC window.
